牟骏荣博客


  • 首页

  • 安卓学习

  • Linux学习

  • 前端

  • 服务端

  • Python

VUE实用案例收集

Posted on 2019-02-23 | In 前端
  • Vue 背景拼接
    1
    :style="{background: 'url( ' + apiimg + x.coverImageUrl +') center center','background-size':'cover'}"

Ionic android 端自动更新

Posted on 2019-01-31 | In 前端

Ionic android 端自动更新重点记录

  • 安装相应包
    1
    2
    3
    4
    5
    6
    7
    8
    ionic cordova plugin add cordova-plugin-file-opener2
    npm install @ionic-native/file-opener

    ionic cordova plugin add cordova-plugin-file-transfer
    npm install @ionic-native/file-transfer

    ionic cordova plugin add cordova-plugin-file-opener2
    npm install @ionic-native/file-opener
  • npm包版本应用4.19.0测试
  • 分别引入到app.modules.ts的providers 里面

更新代码

  • 1
    2
    3
    4
    5
    6
    7
    8
    9
    10
    11
    12
    13
    14
    15
    16
    17
    18
    19
    20
    21
    22
    23
    24
    25
    26
    27
    28
    29
    30
    31
    32
    33
    34
    35
    36
    37
    38
    39
    40
    41
    42
    43
    44
    45
    46
    47
    48
    49
    50
    51
    52
    53
    54
    55
    56
    57
    58
    59
    60
    61
    62
    63
    64
    65
    66
    67
    68
    69
    updateApk() {
    let alert1 = this.alertCtrl.create({
    title: '版本更新',
    message: '检查到最新版本,是否进行更新',
    buttons: [
    {
    text: '否',
    role: 'cancel',
    handler: () => {
    console.log('不进行更新');
    super.showToast(this.toastCtrl, "不进行更新")

    }
    },
    {
    text: '是',
    handler: () => {

    // const updateUrl = 'http://192.168.10.112:9090/appversion.xml';
    // console.log('下载地址');
    // console.log(updateUrl);
    // this.appUpdate.checkAppUpdate(updateUrl).then(() => { console.log('Update available') });
    // alert1.dismiss();
    console.log('更新APP');
    let url = "http://192.168.10.112:9090/apk2.apk";
    console.log(url);

    console.log('开始下载Android代码----------------------------');
    const fileTransfer: FileTransferObject = this.transfer.create();
    try {

    } catch (error) {
    console.log('fileTransfer--Err');
    console.log(JSON.stringify(error));
    }


    fileTransfer.onProgress(progressEvent => {
    var present = new Number((progressEvent.loaded / progressEvent.total) * 100);
    console.log('当前进度为:' + present.toFixed(0));
    // var presentInt = present.toFixed(0);
    // this.loadingService.presentProgress(presentInt);

    });
    let savePath = this.file.dataDirectory + "upload";
    // var savePath = down+ 'android.apk';
    console.log('保存地址');
    console.log(savePath);
    fileTransfer.download(encodeURI(url), savePath).then((entry) => {
    super.showToast(this.toastCtrl, "下载成功");
    console.log('保存apk包的地址为: ' + savePath + 'android.apk');
    console.log('download complete: ' + entry.toURL());
    console.log("下载成功");
    this.fileOpener.open(entry.toURL(), "application/vnd.android.package-archive")
    .then(() => console.log('打开apk包成功!'))
    .catch(e => console.log('打开apk包失败!', e));
    }, (error) => {
    super.showToast(this.toastCtrl, "下载失败");
    console.log("下载失败");
    // this.loadingService.presentTip('操作提醒', '由于部分手机出现异常,请您进入手机设置-应用管理-Ceshiname-权限,将存储权限打开后再进行升级,由此给您带来的不便,敬请谅解。');
    for (var item in error) {
    console.log(item + ":" + error[item]);
    }
    })
    }
    }],
    })
    alert1.present();
    }

Android开发——DeviceUtil,获取Android设备信息的工具类

Posted on 2018-12-03 | In 安卓
  • Android 设备工具DeviceUtil
  • Android 设备工具DeviceUtil dp转换px px转换dp 设备宽度 设备高度 SD卡判断 网络判断 VersionName VersionCode DeviceId 手机品牌 手机型号 系统Android API等级 系统Android 版本 App进程id App进程Name 创建App缓存文件夹 Uri转换File 获取AndroidManifestxml里meta data的值 DeviceUtil全部源码
  • dp转换px
  • 在自定义View中必须用到这个方法。自定义View的时候,不能像在xml那样可以设置dp(密度),只能设置px(像素)。不同分辨率的设备,设置px,显示就不会一样了。为了结合设计图设置dp,需要将dp转换为px值,然后再设置。
1
2
3
4
5
6
7
8
9
10
11
12
13
14
15
16
17
18
19
20
21
22
23
24
25
26
27
28
29
30
31
32
33
34
35
36
37
38
39
40
41
42
43
44
45
46
47
48
49
50
51
52
53
54
55
56
57
58
59
60
61
62
63
64
65
66
67
68
69
70
71
72
73
74
75
76
77
78
79
80
81
82
83
84
85
86
87
88
89
90
91
92
93
94
95
96
97
98
99
100
101
102
103
104
105
106
107
108
109
110
111
112
113
114
115
116
117
118
119
120
121
122
123
124
125
126
127
128
129
130
131
132
133
134
135
136
137
138
139
140
141
142
143
144
145
146
147
148
149
150
151
152
153
154
155
156
157
158
159
160
161
162
163
164
165
166
167
168
169
170
171
172
173
174
175
176
177
178
179
180
181
182
183
184
185
186
187
188
189
190
191
192
193
194
195
196
197
198
199
200
201
202
203
204
205
206
207
208
209
210
211
212
213
214
215
216
217
218
219
220
221
222
223
224
225
226
227
228
229
230
231
232
233
234
235
236
237
238
239
240
241
242
243
244
245
246
247
248
249
250
251
252
253
254
255
256
257
258
259
260
261
262
263
264
265
266
267
268
269
270
271
272
273
274
275
276
277
278
279
280
281
282
283
284
285
286
287
288
289
290
291
292
293
294
295
296
297
298
299
300
301
302
303
304
305
306
307
308
309
310
311
312
313
314
315
316
317
318
319
320
321

import android.annotation.SuppressLint;
import android.app.Activity;
import android.app.ActivityManager;
import android.app.Application;
import android.content.Context;
import android.content.pm.ApplicationInfo;
import android.content.pm.PackageInfo;
import android.content.pm.PackageManager;
import android.database.Cursor;
import android.net.ConnectivityManager;
import android.net.NetworkInfo;
import android.net.Uri;
import android.os.Environment;
import android.provider.MediaStore;
import android.telephony.TelephonyManager;
import android.util.Log;
import java.io.File;
import java.util.Iterator;
import java.util.List;
public class DeviceUtil {
/**
* dp 转化为 px
* @param context
* @param pxValue
* @return
*/
public static int dp2px(Context context, float dpValue) {
final float scale = context.getResources().getDisplayMetrics().density;
return (int) (dpValue * scale + 0.5f);
}
px转换dp
/**
* px 转化为 dp
* @param context
* @param pxValue
* @return
*/
public static int px2dp(Context context, float pxValue) {
final float scale = context.getResources().getDisplayMetrics().density;
return (int) (pxValue / scale + 0.5f);
}
设备宽度
/**
* 获取设备宽度(px)
* @param context
* @return
*/
public static int deviceWidth(Context context) {
return context.getResources().getDisplayMetrics().widthPixels;
}
设备高度
/**
* 获取设备高度(px)
* @param context
* @return
*/
public static int deviceHeight(Context context) {
return context.getResources().getDisplayMetrics().heightPixels;
}
SD卡判断
/**
* SD卡判断
* @return
*/
public static boolean isSDCardAvailable() {
return Environment.getExternalStorageState().equals(Environment.MEDIA_MOUNTED);
}


/**
* SD卡判断
*
* @return
*/
public static boolean isSDCardAvailable() {
return Environment.getExternalStorageState().equals(Environment.MEDIA_MOUNTED);
}

/**
* 是否有网
*
* @param context
* @return
*/
public static boolean isNetworkConnected(Context context) {
if (context != null) {
ConnectivityManager mConnectivityManager = (ConnectivityManager) context
.getSystemService(Context.CONNECTIVITY_SERVICE);
NetworkInfo mNetworkInfo = mConnectivityManager
.getActiveNetworkInfo();
if (mNetworkInfo != null) {
return mNetworkInfo.isAvailable();
}
}
return false;
}

/**
* 返回版本名字
* 对应build.gradle中的versionName
*
* @param context
* @return
*/
public static String getVersionName(Context context) {
String versionName ="" ;
try {
PackageManager packageManager = context.getPackageManager();
PackageInfo packInfo = packageManager.getPackageInfo(context.getPackageName(), 0);
versionName = packInfo.versionName;
} catch (Exception e) {
e.printStackTrace();
}
return versionName;
}

/**
* 返回版本号
* 对应build.gradle中的versionCode
*
* @param context
* @return
*/
public static String getVersionCode(Context context) {
String versionCode = "";
try {
PackageManager packageManager = context.getPackageManager();
PackageInfo packInfo = packageManager.getPackageInfo(context.getPackageName(), 0);
versionCode = String.valueOf(packInfo.versionCode);
} catch (Exception e) {
e.printStackTrace();
}
return versionCode;
}

/**
* 获取设备的唯一标识,deviceId
*
* @param context
* @return
*/
public static String getDeviceId(Context context) {
TelephonyManager tm = (TelephonyManager) context.getSystemService(Context.TELEPHONY_SERVICE);
@SuppressLint("MissingPermission") String deviceId = tm.getDeviceId();
if (deviceId == null) {
return "";
} else {
return deviceId;
}
}

/**
* 获取手机品牌
*
* @return
*/
public static String getPhoneBrand() {
return android.os.Build.BRAND;
}

/**
* 获取手机型号
*
* @return
*/
public static String getPhoneModel() {
return android.os.Build.MODEL;
}

/**
* 获取手机Android API等级(22、23 ...)
*
* @return
*/
public static int getBuildLevel() {
return android.os.Build.VERSION.SDK_INT;
}

/**
* 获取手机Android 版本(4.4、5.0、5.1 ...)
*
* @return
*/
public static String getBuildVersion() {
return android.os.Build.VERSION.RELEASE;
}

/**
* 获取当前App进程的id
*
* @return
*/
public static int getAppProcessId() {
return android.os.Process.myPid();
}

/**
* 获取当前App进程的Name
*
* @param context
* @param processId
* @return
*/
public static String getAppProcessName(Context context, int processId) {
String processName = null;
ActivityManager am = (ActivityManager) context.getSystemService(Context.ACTIVITY_SERVICE);
// 获取所有运行App的进程集合
List l = am.getRunningAppProcesses();
Iterator i = l.iterator();
PackageManager pm = context.getPackageManager();
while (i.hasNext()) {
ActivityManager.RunningAppProcessInfo info = (ActivityManager.RunningAppProcessInfo) (i.next());
try {
if (info.pid == processId) {
CharSequence c = pm.getApplicationLabel(pm.getApplicationInfo(info.processName, PackageManager.GET_META_DATA));

processName = info.processName;
return processName;
}
} catch (Exception e) {
Log.e(DeviceUtil.class.getName(), e.getMessage(), e);
}
}
return processName;
}

/**
* 创建App文件夹
*
* @param appName
* @param application
* @return
*/
public static String createAPPFolder(String appName, Application application) {
return createAPPFolder(appName, application, null);
}

/**
* 创建App文件夹
*
* @param appName
* @param application
* @param folderName
* @return
*/
public static String createAPPFolder(String appName, Application application, String folderName) {
File root = Environment.getExternalStorageDirectory();
File folder;
/**
* 如果存在SD卡
*/
if (DeviceUtil.isSDCardAvailable() && root != null) {
folder = new File(root, appName);
if (!folder.exists()) {
folder.mkdirs();
}
} else {
/**
* 不存在SD卡,就放到缓存文件夹内
*/
root = application.getCacheDir();
folder = new File(root, appName);
if (!folder.exists()) {
folder.mkdirs();
}
}
if (folderName != null) {
folder = new File(folder, folderName);
if (!folder.exists()) {
folder.mkdirs();
}
}
return folder.getAbsolutePath();
}

/**
* 通过Uri找到File
*
* @param context
* @param uri
* @return
*/
public static File uri2File(Activity context, Uri uri) {
File file;
String[] project = {MediaStore.Images.Media.DATA};
Cursor actualImageCursor = context.getContentResolver().query(uri, project, null, null, null);
if (actualImageCursor != null) {
int actual_image_column_index = actualImageCursor
.getColumnIndexOrThrow(MediaStore.Images.Media.DATA);
actualImageCursor.moveToFirst();
String img_path = actualImageCursor
.getString(actual_image_column_index);
file = new File(img_path);
} else {
file = new File(uri.getPath());
}
if (actualImageCursor != null) actualImageCursor.close();
return file;
}

/**
* 获取AndroidManifest.xml里 的值
*
* @param context
* @param name
* @return
*/
public static String getMetaData(Context context, String name) {
String value = null;
try {
ApplicationInfo appInfo = context.getPackageManager().getApplicationInfo(context.getPackageName(), PackageManager.GET_META_DATA);
value = appInfo.metaData.getString(name);
} catch (PackageManager.NameNotFoundException e) {
e.printStackTrace();
}
return value;
}


}

使用JAVA代码实现Android布局

Posted on 2018-11-27 | In 安卓
  • RelativeLayout布局设置

    1
    2
    3
    4
    5
    6
    7
    8
    int screenWidth = ScreenUtils.getScreenWidth(getBaseContext());//获取屏幕高度
    int onew = screenWidth / 5;
    int s1 = onew / 3;
    int magnification = ScreenUtils.dip2px(getBaseContext(), 50) / 50;//获取屏幕高度并算出dp和px的倍数
    ViewGroup.LayoutParams layoutParams = tongzhi_dot.getLayoutParams();
    RelativeLayout.LayoutParams layoutParams2 = new RelativeLayout.LayoutParams(ViewGroup.LayoutParams.WRAP_CONTENT, ViewGroup.LayoutParams.WRAP_CONTENT);
    layoutParams2.setMargins(screenWidth - s1 - 15, magnification * 10, s1, 35 * magnification);//4个参数按顺序分别是左上右下
    tongzhi_dot.setLayoutParams(layoutParams2); //tongzhi_dot 一个View的布局ID
  • LinearLayout

    1
    2
    3
    LinearLayout.LayoutParams lp = new LinearLayout.LayoutParams(LinearLayout.LayoutParams.WRAP_CONTENT, LinearLayout.LayoutParams.WRAP_CONTENT);
    lp.setMargins(10, 20, 30, 40);
    imageView.setLayoutParams(lp);
  • LinearLayout 设置高宽

    1
    2
    LinearLayout box = (LinearLayout) layout.findViewById(R.id.dialog_liner_box);
    box.setLayoutParams(new LinearLayout.LayoutParams((int) (ScreenUtils.getScreenWidth(context) * 0.8), ViewGroup.LayoutParams.WRAP_CONTENT));

ScreenUtils 分享

1
2
3
4
5
6
7
8
9
10
11
12
13
14
15
16
17
18
19
20
21
22
23
24
25
26
27
28
29
30
31
32
33
34
35
36
37
38
39
40
41
42
43
44
45
46
47
48
49
50
51
52
53
54
55
56
57
58
59
60
61
62
63
64
65
66
67
68
69
70
71
72
73
74
75
76
77
78
79
80
81
82
83
84
85
86
87
88
89
90
91
92
93
94
95
96
97
98
99
100
101
102
103
104
105
106
107
108
109
110
111
112
113
114
115
116
117
118
119
120
121
122
123
124
125
126
127
128
129
130
131
132
133
134
135
136
137
138
139
140
141
import android.app.Activity;
import android.content.Context;
import android.graphics.Bitmap;
import android.graphics.Rect;
import android.util.DisplayMetrics;
import android.view.View;
import android.view.WindowManager;

/**
* 获得屏幕相关的辅助类
*
*
*/
public class ScreenUtils {

/**
* 获得屏幕高度
*
* @param context
* @return
*/
public static int getScreenWidth(Context context) {
WindowManager wm = (WindowManager) context.getSystemService(Context.WINDOW_SERVICE);
DisplayMetrics outMetrics = new DisplayMetrics();
wm.getDefaultDisplay().getMetrics(outMetrics);
return outMetrics.widthPixels;
}

/**
* 获得屏幕宽度
*
* @param context
* @return
*/
public static int getScreenHeight(Context context) {
WindowManager wm = (WindowManager) context.getSystemService(Context.WINDOW_SERVICE);
DisplayMetrics outMetrics = new DisplayMetrics();
wm.getDefaultDisplay().getMetrics(outMetrics);
return outMetrics.heightPixels;
}

/**
* 根据手机的分辨率从 dp 的单位 转成为 px(像素)
*/
public static int dip2px(Context context, float dpValue) {
float scale = context.getResources().getDisplayMetrics().density;
return (int) (dpValue * scale + 0.5f);
}

/**
* 根据手机的分辨率从 px(像素) 的单位 转成为 dp
*/
public static int px2dip(Context context, float pxValue) {
float scale = context.getResources().getDisplayMetrics().density;
return (int) (pxValue / scale + 0.5f);
}


/**
* 根据手机的分辨率从 sp 的单位 转成为 px(像素)
*/
public static int sp2px(Context context, float spValue) {
float scale = context.getResources().getDisplayMetrics().scaledDensity;
return (int) (spValue * scale + 0.5f);
}

/**
* 根据手机的分辨率从 px(像素) 的单位 转成为 sp
*/
public static int px2sp(Context context, float pxValue) {
float scale = context.getResources().getDisplayMetrics().scaledDensity;
return (int) (pxValue / scale + 0.5f);
}


/**
* 获得状态栏的高度
*
* @param context
* @return
*/
public static int getStatusHeight(Context context) {

int statusHeight = -1;
try {
Class<?> clazz = Class.forName("com.android.internal.R$dimen");
Object object = clazz.newInstance();
int height = Integer.parseInt(clazz.getField("status_bar_height").get(object).toString());
statusHeight = context.getResources().getDimensionPixelSize(height);
} catch (Exception e) {
e.printStackTrace();
}
return statusHeight;
}

/**
* 获取当前屏幕截图,包含状态栏
*
* @param activity
* @return
*/
public static Bitmap snapShotWithStatusBar(Activity activity) {
View view = activity.getWindow().getDecorView();
view.setDrawingCacheEnabled(true);
view.buildDrawingCache();
Bitmap bmp = view.getDrawingCache();
int width = getScreenWidth(activity);
int height = getScreenHeight(activity);
Bitmap bp = null;
bp = Bitmap.createBitmap(bmp, 0, 0, width, height);
view.destroyDrawingCache();
return bp;

}

/**
* 获取当前屏幕截图,不包含状态栏
*
* @param activity
* @return
*/
public static Bitmap snapShotWithoutStatusBar(Activity activity) {
View view = activity.getWindow().getDecorView();
view.setDrawingCacheEnabled(true);
view.buildDrawingCache();
Bitmap bmp = view.getDrawingCache();
Rect frame = new Rect();
activity.getWindow().getDecorView().getWindowVisibleDisplayFrame(frame);
int statusBarHeight = frame.top;

int width = getScreenWidth(activity);
int height = getScreenHeight(activity);
Bitmap bp = null;
bp = Bitmap.createBitmap(bmp, 0, statusBarHeight, width, height - statusBarHeight);
view.destroyDrawingCache();
return bp;

}

}

androidRecyclerViewAdapter技巧

Posted on 2018-11-22 | In 安卓
  • 设置布局加载方式

    1
    tv_menu_list.setLayoutManager(new GridLayoutManager(this, 3)); //设置布局加载方式
  • 视图布局

    1
    2
    3
    4
    5
    6
    7
    8
    9
    10
    11
    12
    13
    14
    15
    16
    17
    18
    19
    20
    21
    22
    23
    24
    25
    26
    27
    28
    29
    30
    <RelativeLayout xmlns:android="http://schemas.android.com/apk/res/android"
    android:id="@+id/items"
    android:layout_width="match_parent"
    android:layout_height="match_parent"
    android:paddingBottom="10dp"
    android:background="#ffffff">

    <ImageView
    android:id="@+id/imageview_center"
    android:layout_centerHorizontal="true"
    android:layout_marginTop="20dp"
    android:background="#00000000"
    android:gravity="center"
    android:layout_marginBottom="20dp"
    android:scaleType="centerCrop"
    android:src="@drawable/logo1"
    android:visibility="visible"
    android:layout_width="60dp"
    android:layout_height="60dp" />

    <TextView
    android:layout_below="@+id/imageview_center"
    android:gravity="center"
    android:id="@+id/textview_center"
    android:layout_width="match_parent"
    android:text="asdfasdf水电费"
    android:layout_height="wrap_content" />


    </RelativeLayout>
  • RecyclerView.Adapter

    1
    2
    3
    4
    5
    6
    7
    8
    9
    10
    11
    12
    13
    14
    15
    16
    17
    18
    19
    20
    21
    22
    23
    24
    25
    26
    27
    28
    29
    30
    31
    32
    33
    34
    35
    36
    37
    38
    39
    40
    41
    42
    43
    44
    private class TvAdapter extends RecyclerView.Adapter<TvAdapter.ViewHolder> {

    @NonNull
    @Override
    public ViewHolder onCreateViewHolder(@NonNull ViewGroup parent, int viewType) {
    View inflate = View.inflate(getBaseContext(), R.layout.tv_menu_list_tiem_layout, null);
    return new ViewHolder(inflate);
    }

    @Override
    public void onBindViewHolder(@NonNull ViewHolder holder, int position) {
    holder.textview.setText(tvDataList.get(position).getTitle());

    Picasso.with(getBaseContext())
    .load(app.getImgurl()+tvDataList.get(position).getCoverImageUrl())
    .placeholder(R.drawable.defaultbg)
    .error(R.drawable.defaultbg)
    .fit()
    .into(holder.img);

    }

    @Override
    public int getItemCount() {
    return tvDataList.size();
    }

    class ViewHolder extends RecyclerView.ViewHolder {
    private TextView textview; //定义视图布局
    private ImageView img;//定义视图布局

    public ViewHolder(View itemView) {
    super(itemView);
    textview = (TextView) itemView.findViewById(R.id.textview_center);
    img = (ImageView) itemView.findViewById(R.id.imageview_center);
    itemView.setOnClickListener(new View.OnClickListener() {
    @Override
    public void onClick(View view) {
    //跳转方式
    }
    });
    }
    }
    }

android应用启动显示白色背景的解决方法

Posted on 2018-11-20 | In 安卓

android应用启动显示白色背景的解决方法

  • android app在点击图标进入应用的时候会先显示白色背景,然后才显示我们设置的启动页面,这样用户体验很不好。
    这时候需要给启动的第一个activity(一般为splash activity)设置一个背景,这样就可以避免这种情况了
    首先,在styles.xml文件中添加

    1
    2
    3
    <style name="SplashTheme" parent="Theme.AppCompat.Light.NoActionBar">
    <item name="android:windowBackground">@drawable/bg_splash</item>
    </style>
  • 其中bg_splash是splash页面的背景

  • 然后在manifest文件的splash activity标签下加入

    1
    android:theme="@style/SplashTheme"
  • 这样在应用启动的时候就会直接显示splash页面了。另外如果在splash页面中如果也是只显示bg_splash而没有其他控件需要显示的话,可以不用在activity的onCreate方法中设置setContentView了

解决android加载国外java包失败

Posted on 2018-11-20 | In 安卓
  • 怎么打开都报Could not find lint-gradle-api.jar ,网上百度好多方法,只有这样解决了,贴下链接:
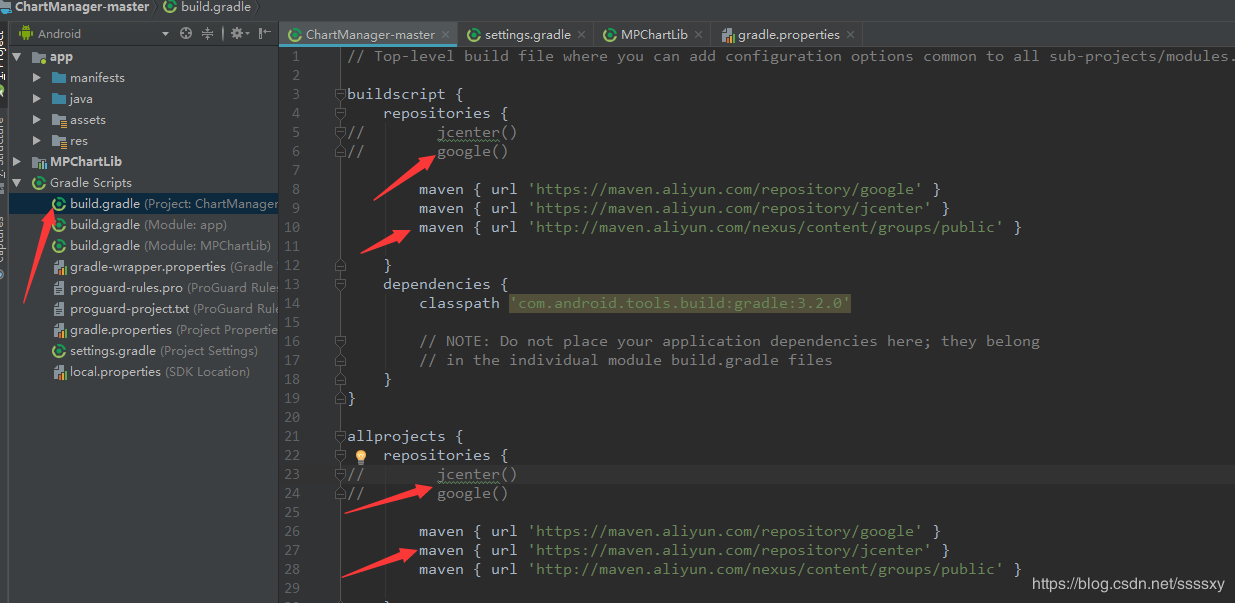
  • 解决 Could not find lint-gradle-api.jar

1
2
3
4
maven { url 'https://maven.aliyun.com/repository/google' }
maven { url 'https://maven.aliyun.com/repository/jcenter' }
maven { url 'http://maven.aliyun.com/nexus/content/groups/public' }
maven{url "https://jitpack.io"}//部分github上资源获取不到可以使用

Android中使用GPS和NetWork获取定位信息

Posted on 2018-09-19 | In 安卓
  • 在Android中定位是属于危险权限,需要在添加Mainfest.xml中添加。
    1
    2
    <uses-permission android:name="android.permission.ACCESS_COARSE_LOCATION" />
    <uses-permission android:name="android.permission.ACCESS_FINE_LOCATION" />

定位的几种方式

  • 在Android系统当中,给我们提供了四种定位方式,分别是:
  • network
    它是依靠信号塔或WiFi来定位的。对应的provider字段是LocationManager.NETWORK_PROVIDER,是一种低精度,低耗电的初略定位方式。
  • gps 它是依靠GPS来定位的。对应的provider字段是LocationManager.GPS_PROVIDER,是高精度,高耗电的精准定位方式。
  • passive 被动的获取定位信息,通过接受其他APP或service的定位信息。不过需要这个权限ACCESS_FINE_LOCATION。

    1
    <uses-permission android:name="android.permission.ACCESS_FINE_LOCATION" />
  • fused Google已经将这个定位方式hide了。

获取定位的api封装

1
2
3
4
5
6
7
8
9
10
11
12
13
14
15
16
17
18
19
20
21
22
23
24
25
26
27
28
29
30
31
32
33
34
35
36
37
38
39
40
41
42
43
44
45
46
47
48
49
50
51
52
53
54
55
56
57
58
59
60
61
62
63
64
65
66
67
68
69
70
71
72
73
74
75
76
77
78
79
80
81
82
83
84
85
86
87
88
89
90
91
92
93
94
95
96
97
98
99
100
101
102
103
104
105
106
107
108
109
110
111
112
113
114
115
116
117
118
119
120
121
122
123
124
125
126
127
128
129
130
131
132
133
134
135
136
137
138
139
140
141
142
public class LocationUtils {

private static final long REFRESH_TIME = 5000L;
private static final float METER_POSITION = 0.0f;
private static ILocationListener mLocationListener;
private static LocationListener listener = new MyLocationListener();

private static class MyLocationListener implements LocationListener {
@Override
public void onLocationChanged(Location location) {//定位改变监听
if (mLocationListener != null) {
mLocationListener.onSuccessLocation(location);
}
}

@Override
public void onStatusChanged(String provider, int status, Bundle extras) {//定位状态监听

}

@Override
public void onProviderEnabled(String provider) {//定位状态可用监听

}

@Override
public void onProviderDisabled(String provider) {//定位状态不可用监听

}
}

/**
* GPS获取定位方式
*/
public static Location getGPSLocation(@NonNull Context context) {
Location location = null;
LocationManager manager = getLocationManager(context);
//高版本的权限检查
if (ActivityCompat.checkSelfPermission(context, Manifest.permission.ACCESS_FINE_LOCATION) != PackageManager.PERMISSION_GRANTED) {
return null;
}
if (manager.isProviderEnabled(LocationManager.GPS_PROVIDER)) {//是否支持GPS定位
//获取最后的GPS定位信息,如果是第一次打开,一般会拿不到定位信息,一般可以请求监听,在有效的时间范围可以获取定位信息
location = manager.getLastKnownLocation(LocationManager.GPS_PROVIDER);
}
return location;
}

/**
* network获取定位方式
*/
public static Location getNetWorkLocation(Context context) {
Location location = null;
LocationManager manager = getLocationManager(context);
//高版本的权限检查
if (ActivityCompat.checkSelfPermission(context, Manifest.permission.ACCESS_COARSE_LOCATION) != PackageManager.PERMISSION_GRANTED) {
return null;
}
if (manager.isProviderEnabled(LocationManager.NETWORK_PROVIDER)) {//是否支持Network定位
//获取最后的network定位信息
location = manager.getLastKnownLocation(LocationManager.NETWORK_PROVIDER);
}
return location;
}

/**
* 获取最好的定位方式
*/
public static Location getBestLocation(Context context, Criteria criteria) {
Location location;
LocationManager manager = getLocationManager(context);
if (criteria == null) {
criteria = new Criteria();
}
String provider = manager.getBestProvider(criteria, true);
if (TextUtils.isEmpty(provider)) {
//如果找不到最适合的定位,使用network定位
location = getNetWorkLocation(context);
} else {
//高版本的权限检查
if (ActivityCompat.checkSelfPermission(context, Manifest.permission.ACCESS_COARSE_LOCATION) != PackageManager.PERMISSION_GRANTED
&& ActivityCompat.checkSelfPermission(context, Manifest.permission.ACCESS_FINE_LOCATION) != PackageManager.PERMISSION_GRANTED) {
return null;
}
//获取最适合的定位方式的最后的定位权限
location = manager.getLastKnownLocation(provider);
}
return location;
}

/**
* 定位监听
*/
public static void addLocationListener(Context context, String provider, ILocationListener locationListener) {

addLocationListener(context, provider, REFRESH_TIME, METER_POSITION, locationListener);
}

/**
* 定位监听
*/
public static void addLocationListener(Context context, String provider, long time, float meter, ILocationListener locationListener) {
if (locationListener != null) {
mLocationListener = locationListener;
}
if (listener == null) {
listener = new MyLocationListener();
}
LocationManager manager = getLocationManager(context);
if (ActivityCompat.checkSelfPermission(context, Manifest.permission.ACCESS_FINE_LOCATION) != PackageManager.PERMISSION_GRANTED
&& ActivityCompat.checkSelfPermission(context, Manifest.permission.ACCESS_COARSE_LOCATION) != PackageManager.PERMISSION_GRANTED) {
return;
}
manager.requestLocationUpdates(provider, time, meter, listener);
}

/**
* 取消定位监听
*/
public static void unRegisterListener(Context context) {
if (listener != null) {
LocationManager manager = getLocationManager(context);
if (ActivityCompat.checkSelfPermission(context, Manifest.permission.ACCESS_FINE_LOCATION) != PackageManager.PERMISSION_GRANTED
&& ActivityCompat.checkSelfPermission(context, Manifest.permission.ACCESS_COARSE_LOCATION) != PackageManager.PERMISSION_GRANTED) {
return;
}
//移除定位监听
manager.removeUpdates(listener);
}
}

private static LocationManager getLocationManager(@NonNull Context context) {
return (LocationManager) context.getSystemService(Context.LOCATION_SERVICE);
}

/**
* 自定义接口
*/
public interface ILocationListener {
void onSuccessLocation(Location location);
}
}

获取定位使用实例

1
2
3
4
5
6
7
8
9
10
11
12
13
14
15
16
17
18
19
20
21
22
23
24
25
26
27
28
29
30
31
32
33
34
35
36
37
38
39
40
41
42
43
44
45
46
47
48
49
50
51
52
53
54
55
56
57
58
59
60
61
62
63
64
65
66
67
68
69
70
71
72
73
74
75
76
77
78
79
80
81
82
83
84
85
86
87
88
89
90
91
92
93
94
95
96
97
98
99
100
101
102
103
104
105
106
107
108
109
110
111
112
113
114
115
116
117
118
119
120
121
122
123
124
125
126
127
128
129
130
131
132
133
134
135
136
137
138
139
140
141
142
public class MainActivity extends AppCompatActivity implements View.OnClickListener {

private boolean flag;
private Button gsp_btn;
private Button network_btn;
private Button best_btn;
private static Context context;

@Override
protected void onCreate(Bundle savedInstanceState) {
super.onCreate(savedInstanceState);
setContentView(R.layout.activity_main);
context = getApplicationContext();

initView();
initListener();
}

private void initListener() {
gsp_btn.setOnClickListener(this);
network_btn.setOnClickListener(this);
best_btn.setOnClickListener(this);
}

@Override
protected void onResume() {
super.onResume();
initPermission();//针对6.0以上版本做权限适配
}

private void initView() {
gsp_btn = (Button) findViewById(R.id.gps);
network_btn = (Button) findViewById(R.id.net);
best_btn = (Button) findViewById(R.id.best);
}

private void initPermission() {
if (Build.VERSION.SDK_INT >= Build.VERSION_CODES.M) {
//检查权限
if (ActivityCompat.checkSelfPermission(this, Manifest.permission.ACCESS_COARSE_LOCATION) != PackageManager.PERMISSION_GRANTED
|| ActivityCompat.checkSelfPermission(this, Manifest.permission.ACCESS_FINE_LOCATION) != PackageManager.PERMISSION_GRANTED) {
//请求权限
ActivityCompat.requestPermissions(this, new String[]{Manifest.permission.ACCESS_COARSE_LOCATION, Manifest.permission.ACCESS_FINE_LOCATION}, 1);
} else {
flag = true;
}
} else {
flag = true;
}
}

/**
* 权限的结果回调函数
*/
@Override
public void onRequestPermissionsResult(int requestCode, @NonNull String[] permissions, @NonNull int[] grantResults) {
super.onRequestPermissionsResult(requestCode, permissions, grantResults);
if (requestCode == 1) {
flag = grantResults[0] == PackageManager.PERMISSION_GRANTED && grantResults[1] == PackageManager.PERMISSION_GRANTED;
}
}

@Override
public void onClick(View v) {
switch (v.getId()) {
case R.id.gps:
if (flag) {
getGPSLocation();
} else {
Toast.makeText(this, "no permission", Toast.LENGTH_SHORT).show();
}
break;
case R.id.net:
if (flag) {
getNetworkLocation();
} else {
Toast.makeText(this, "no permission", Toast.LENGTH_SHORT).show();
}
break;
case R.id.best:
if (flag) {
getBestLocation();
} else {
Toast.makeText(this, "no permission", Toast.LENGTH_SHORT).show();
}
break;
}
}

/**
* 通过GPS获取定位信息
*/
public void getGPSLocation() {
Location gps = LocationUtils.getGPSLocation(this);
if (gps == null) {
//设置定位监听,因为GPS定位,第一次进来可能获取不到,通过设置监听,可以在有效的时间范围内获取定位信息
LocationUtils.addLocationListener(context, LocationManager.GPS_PROVIDER, new LocationUtils.ILocationListener() {
@Override
public void onSuccessLocation(Location location) {
if (location != null) {
Toast.makeText(MainActivity.this, "gps onSuccessLocation location: lat==" + location.getLatitude() + " lng==" + location.getLongitude(), Toast.LENGTH_SHORT).show();
} else {
Toast.makeText(MainActivity.this, "gps location is null", Toast.LENGTH_SHORT).show();
}
}
});
} else {
Toast.makeText(this, "gps location: lat==" + gps.getLatitude() + " lng==" + gps.getLongitude(), Toast.LENGTH_SHORT).show();
}
}

/**
* 通过网络等获取定位信息
*/
private void getNetworkLocation() {
Location net = LocationUtils.getNetWorkLocation(this);
if (net == null) {
Toast.makeText(this, "net location is null", Toast.LENGTH_SHORT).show();
} else {
Toast.makeText(this, "network location: lat==" + net.getLatitude() + " lng==" + net.getLongitude(), Toast.LENGTH_SHORT).show();
}
}

/**
* 采用最好的方式获取定位信息
*/
private void getBestLocation() {
Criteria c = new Criteria();//Criteria类是设置定位的标准信息(系统会根据你的要求,匹配最适合你的定位供应商),一个定位的辅助信息的类
c.setPowerRequirement(Criteria.POWER_LOW);//设置低耗电
c.setAltitudeRequired(true);//设置需要海拔
c.setBearingAccuracy(Criteria.ACCURACY_COARSE);//设置COARSE精度标准
c.setAccuracy(Criteria.ACCURACY_LOW);//设置低精度
//... Criteria 还有其他属性,就不一一介绍了
Location best = LocationUtils.getBestLocation(this, c);
if (best == null) {
Toast.makeText(this, " best location is null", Toast.LENGTH_SHORT).show();
} else {
Toast.makeText(this, "best location: lat==" + best.getLatitude() + " lng==" + best.getLongitude(), Toast.LENGTH_SHORT).show();
}
}

}
  • 关于GPS定位的信息还有比较多的内容,在API24中GpsStauts类过时,使用GnssStatus类替换,同时在LocationManager中的一些GPS状态的监听,也被新的API退换。

ubuntu上gitee设置好公钥后pull/push/clone还是需要输入账号密码

Posted on 2018-09-14 | In Linux
  • 设置公钥步骤请看 https://gitee.com/help/articles/4181

    修改部分

  • 配置后出现

    1
    Hi XXX! You've successfully authenticated, but Gitee.com does not provide shell access.
  • 进入 .git/config

    1
    2
    3
    [remote "origin"]
    url = https://gitee.com/username/xxx.git
    fetch = +refs/heads/*:refs/remotes/origin/*
  • 修改成

    1
    2
    3
    [remote "origin"]
    url =git@gitee.com:username/xxx.git
    fetch = +refs/heads/*:refs/remotes/origin/*
  • 配置好之后还需要输入密码原因是 https 是一种安全传输模式默认需要输入密码

linux编译安装php nginx部分代码

Posted on 2018-09-14 | In Linux

安装php

1
2
3
4
5
6
7
8
9
./configure --prefix=/home/php5.6 --enable-fpm --with-png-dir  --with-gd  --enable-gd-native-ttf  
--enable-gd-jis-conv --with-png-dir --with-zlib --with-zlib-dir --with-freetype-dir
--with-mysql --enable-mysqlnd
#查找帮助./configure --help|grep fpm
#make && make install
经过漫长时间的等待
#cp php.ini-development /usr/local/php5/lib/php.ini 复制 php.ini
#cp /usr/local/php5/etc/php-fpm.conf.default php-fpm.conf 复制 fpm 配置文件
#/usr/local/php5/bin/php -varsoin

##nginx 安装

1
2
3
4
5
6
7
8
9
10
11
12
13
14
15
16
17
18
#./configure --prefix=/usr/local/nginx  --with-http_stub_status_module --with-http_ssl_module //后面为 https 模块 
.....
#/usr/local/nginx/sbin/nginx
打开浏览器 http://localhost
Welcome to nginx! 安装成功
nginx 支持 php
#vi /usr/local/nginx/conf/nginx.conf
把以下取消注释
location ~ .php$ {
root html;
fastcgi_pass 127.0.0.1:9000;
fastcgi_index index.php;
fastcgi_param SCRIPT_FILENAME /usr/local/nginx/html/$fastcgi_script_name;
include fastcgi_params;
}
重启 nginx
#pkill -9 nginx
#/usr/local/nginx/sbin/nginx

123…6

牟骏荣

52 posts
11 categories
57 tags
loading css3 动态特效 android View angular drawable dom Scroll 鼠标拖动 express nodejs git 前端 ubuntu linux ionic relativelayout 相对布局 VSCode webview RecyclerView javascript nginx ueditor nodeJs shell chrome gitee VUE linearlayout 瀑布流 实例 php GPS 工具类 mongodb 百度地图 demo echart 图标 资源 Promise python 爬虫 webstorm js django sql 正则表达式 mongo intput 预览图片 验证码 close phone scroll
© 2019 牟骏荣